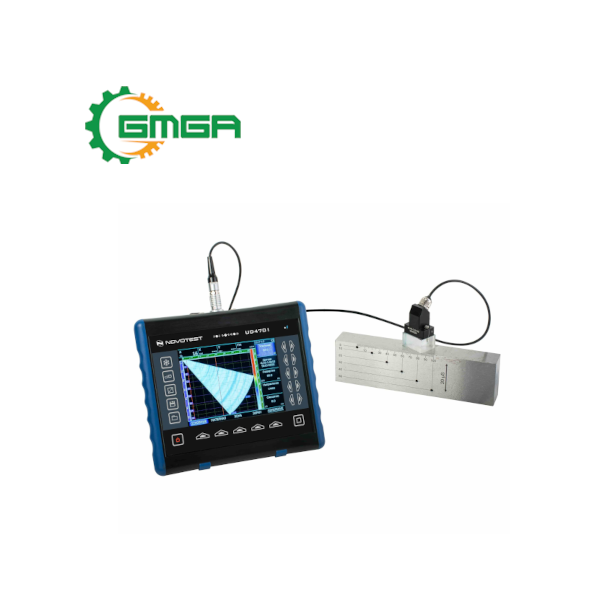
NOVOTEST UD4701PA ultrasonic vulnerability detector
Price: Contact
| Model | UD4701PA |
| Manufacturer | NOVOTEST |
| Power supply | Li-ion 10.8V, 5000 mА/h |
| Weight | 1.4 Kg |
| Size | 200 x 225 x 80 mm |
| Condition | Stocking |
| Warranty | 12 months |
I. Specification NOVOTEST UD4701PA Ultrasonic Vulnerability Detector
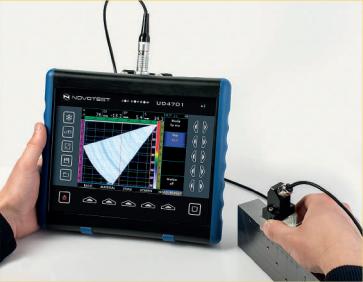
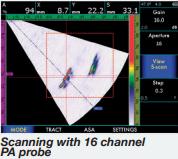
- The NOVOTEST UD4701PA ultrasonic flaw tester can be used both with a standard 1-channel probe and with a PA 16-channel probe. Using the SAFT method, the device allows to obtain high-resolution scanned images. high and high quality. Using a replaceable prism, allows to avoid probe wear and to inspect any curved surfaces.
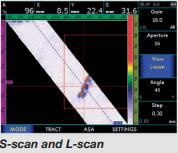
- Based on innovative technologies, the NOVOTEST UD4701PA ultrasonic vulnerability detector is lightweight (1.5 kg) and includes functions such as A, B, C, D, S, L-scan, TOFD, DAC , DGS, AFS, AWS, automatic correction of ultrasonic velocity, reconstruction mode of weld geometry and other.
- Calibration blocks are made with grooves (anglers) made of the same materials (steel, stainless steel, aluminum and others) as those under test, where the geometry (thickness) and surface radius of the reference sample) having the same characteristics as the item under test.
***See more of GMGA's ultrasonic flaw testers at: https://gmga.vn/en/danh-muc/maintenance-equipment/vulnerability-detector/
II. Specifications of ultrasonic flaw detector NOVOTEST UD4701PA
|
UD4701PA |
|
|
Weight |
1.4 kg with batteries |
| Size (H x W x L) |
200 mm x 225 mm x 80 mm |
|
Operating temperature range |
From -30 C to +55 C |
| Supply voltage |
15V / 2,5А DC |
|
External power supply |
Power Supply 220В AC |
| Working hours |
not less 10 hours of operation from the built-in battery |
|
Battery |
Li-ion 10.8V, 5000 mА/h |
| Transducer connectors |
2 Х Lemo00,1 Х Lemo 16 |
|
Firmware Upgrade |
Self-powered by USB |
| Menu Language |
Russian, English |
|
Interface |
USB |
| Memory |
200 settings with A-signal |
|
1000 monitoring protocols and scan results |
|
| Display |
Color high contrast, TFT 640 x 480 pixels, (130 x 100 mm). |
|
Changing the color schemes of the screen for viewing and lighting conditions |
Yes |
| Processing the image on the screen after “freezing” the screen |
Full-featured processing and analysis |
|
Support for the weld inspection standard AWS D1.1 |
Yes, with automatic calculation D1.1 Ratio |
| Comparison with the saved reference signal |
Automatic in the entire amplification range |
|
Estimation of the size of defects in the classical flaw detector mode |
built-in ADD diagrams |
| Amplitude measurement |
In percentage of the height of the screen, |
|
In dB relative to the threshold level in the zone, |
|
|
In dB relative to the reference signal, |
|
|
By DAC |
|
| Automatic Defect Alarm |
Light, sound |
|
Simultaneous display of signals on the screen in the PR mode in manual mode |
S-scan |
|
А-scan + S-scan, |
|
|
А-scan + B-scan, |
|
|
S-scan + B-scan, |
|
|
А-scan + S-scan + B-scan |
|
| Determination of linear dimensions between reflectors in S-scan |
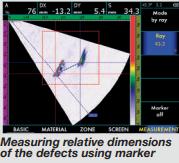
By two markers, set manually or automatically |
|
Calculation of the coordinates of the reflectors on the S-scan |
Automatically in the entire range of S-scan, using a mathematical model of the prism in the memory of the flaw detector, the accuracy of determining the coordinates to 0.1mm |
| Algorithm for finding a defect in the testeing zone |
Automatically on the maximum amplitude of the signal in the zone, auto at the maximum amplitude of the signal on the selected beam, manually |
|
Control zones |
Rectangular zone for allocation of a part of a signal on an S-scan with an accuracy of setting boundaries to 0.1mm |
|
2 independent time-domain zones |
|
|
Display of signals on the screen (visualization) |
А-scan, B-scan, С-scan, D-scan, S-scan, L-scan, TOFD |
| Digital signal filtering |
Yes |
|
Analog Signal Filtering |
Yes |
| Additional key + dB |
6 |
|
Electrical damping of the converter to increase the resolution |
25 Ω, 50 Ω, 600 Ω |
| Gain Control Range |
100 dB, in step 0.5, 1, 2, 6 dB |
|
Amplifier |
Broadband: 0.1-20 MHz, with the option of narrowband filters |
| B-Scan |
Display of real weld geometry (True-to-geometry imaging) |
|
Using TOFD |
Single-channel TOFD with recording by the path of probe or time |
| Using scanners |
Any 2-axis scanners with optical encoders, scans in the memory of the device, analysis of scans in the device, and in a special analysis software |
|
Welded joint geometry designer |
Built-in helper, displaying the cutting of the seam on the scan image |
| Automatic calibration of ultrasonic velocity |
Yes |
|
Automatic calibration of the control range for a given seam thickness |
Yes |
| Frequency of recurrences |
Is automatically set depending on the set parameters |
|
Sounding impulse |
Radio pulse amplitude of 50 V, with adjustable number of periods (0.5-5) |
| Speed range |
100 – 10 000 m/s |
|
Scanning mode |
S-scan (sector scan), L-scan (linear scan with a constant angle) |
| Scan |
Min.: 0 – 5 mm |
|
Max.: 0 – 3200 mm (depends on the operating modes and the converter) |
|
|
In step 0.1, 1, 5, 10 mm |
|
| Automatic calibration of the delay in the prism |
With V-2 calibration block from reflector, calibration of TOFD converters |
|
Leveling of sensitive in depth |
TVG, up to 10 dB / μs, with an accuracy of 0.01 dB / μs |
| Aligning the sensitivity at the corners while scanning |
2D correction (10 lines in depth, 20 points for corner correction each) |
|
Adjusting the angle scan angle |
From 0,3 to 2 degrees |
| Adjustment of working aperture |
4, 8 and 16 simultaneously working elements |
|
Adjustment of the FR parameters of the converter |
Automatic from non-volatile memory of the device |
| Algorithm for signal processing |
Digital signal focusing using the C-SAFT / TFM method |
|
Type of PHAs used |
Any classic 16-channel PA |
| Gross weight, not more than |
8 kg |
***Video of ultrasonic flaw detector is available at: Gmga Measuring Youtube.
No comments yet
SIGN UP FOR A CONSULTATION
Please fill in the form below and send your comments and questions to GMGA, we will respond to your email as soon as possible.

COMMIT
100% new product

COMMIT
100% refund if the product is of bad quality and not as promised

DELIVERY
Nationwide




Review NOVOTEST UD4701PA ultrasonic vulnerability detector
There are no reviews yet.